Showing posts with label embroidery. Show all posts

Thursday, 22 January 2015

Commissions update - Snowdrops 2

The best travelled sampler!

Well, so much for being determined in March 2014 to get back on track this commission.

To be honest, progress was more or less non-existent until the Christmas break, but it must be in the running for the 'most travelled embroidery project' by now with numerous trips to Cardiff and Norfolk, not to mention Brussells, north Wales and Provence in 2014.  I'm really pleased (and hugely relieved) with how it is going now. There was a mild (understatement of the week!) panic over the weekend when I got to the last corner and realised that the two 'ends' were one thread out of line.  Yes ONE thread!!!  Aaargh!

But, I found where I'd gone wrong and thankfully it isn't as big a 'repair' job as I'd feared. So, last lap here I come.  Just one more repeat of the V shaped motif and it is on to the text of the poem for the central space.  I still have the white flowers to catch up on (daylight is an absolute MUST for these at this time of year), which I may still outline (watch this space).

I'd love to find a suitable font for the poem though.  The border is 'art nouveau' influenced and all the backstitch ones I've found so far don't really 'match'.  There are plenty of lovely cross-stitch ones around on-line, but I'm constrained now by the border, so it can't be too large.  I've found some nice 'print' fonts, which I may attempt to convert to backstitch (or at most, cross-stitch over one thread).  We'll see how much time I have.  I don't really want to 'spoil the ship for a ha'porth of tar' this close to the finishing line though!

Thursday, 27 March 2014

Commission update - Snowdrops

Along with everything else in my life recently, my commissions have taken a bit of a back seat.  But with the New Year, new-found energy (if it lasts!) and getting rid of my back-log of odd jobs, I'm getting determined to get back on track with the last commission of 2013.

My last update about it was months ago.  So HIGH time for me to be getting on with it again.  Over Christmas I was, at least, able to touch base with the commissioner, and I think they were rather surprised that it was as big as it is.  In fact, I suspect they hadn't expected me to go to quite so much trouble with the border (which is going to be quite prominent).

Progress has been slow until fairly recently, but I'm now fairly happy with how it is coming along now. Getting the first corner right was a little complicated and took longer than I'd expected.  I had made two versions of the chart to see which looked best, but even so, when it came to stitching it, it changed slightly. I'm a little disappointed that there isn't more of a contrast between the fabric and the white of the snowdrops. I'll have to see how it goes, but I may end up outlining them so they stand out more.

I'm expecting the stitching of the poem in the central space to be quite a quick job after the wide border though.  Let's keep our fingers crossed!

It is a good feeling to have turned a corner (excuse the pun!) and realise that I'm over half-way through the border now.

Thursday, 23 January 2014

Blasts from the past

While having a bit of a tidy up recently, I came across a pile of photographs of stuff I've made over the years.  I've had them in various albums in the past, but not collectively for some reason.  I've shown you some of my past projects here and a conversation with a colleague prompted me to scan the photos to share a few more with you.

So here goes - I'll try to remember why and when they were made, but can't promise I'll manage it with all of them.  And if I find any more, I'll let you know!
Needle book - made at my first primary school
Dress for former primary school teacher's
first daughter - made in early teens
3D crewel embroidery - made in my teens
Kate Greenaway initial - made in my teens
Needlepoint sampler - made in my teens
Crewel work picture - made in my teens
Celtic cross - made in my teens
Needlepoint version of
David painting - late teens
Needlepoint depiction of spring -
stitched during my first year at uni

Wednesday, 25 September 2013

Lacking motivation

I've been feeling guilty.  Very guilty in fact.  Guilty for not posting more regularly, guilty for not getting through my embroidery/sewing etc tasks more efficiently, guilty that it has taken me so long to catch up on chores, guilty for enjoying the heat wave instead of getting on with stuff,.... guilty about EVERYTHING.

But, following a 'bit' of a crisis in the family, everything has been put in perspective and I think, maybe, hopefully, I'm beginning to see light at the end of the tunnel again.  And with a bit of luck that will bring new-found energy and enthusiasm to get back on track (and get posting again!).

When asked how he coped with completing UFOs or difficult projects, Kaffe Fassett said he used the 'F-word' and the 'C-word' - I'm not sure what you're thinking, but he meant 'focus' and 'concentration'! Do they work for you?  How do you cope when you hit a slump, or feel overwhelmed by stuff? 

Monday, 15 July 2013

Commission update - church banner

This year marks the 200th anniversary of my church in Cardiff.  The church has organised a number of activities to mark the occasion and amongst them is a banner made by members of the church.
Now, as I don't live in Cardiff anymore, I'm not entirely sure how it all came about, but my understanding is that one of the younger members of the church is a budding designer and she designed the banner. Someone has prepared the banner by cutting all the pieces out and applying them with a fusing material (eg bondaweb) to the backing fabric and then it has been passed around a number of members to embellish/sew around the edges.
When the idea was originally mooted, I showed an interest and was told I could probably be responsible for a motif on the banner, eg the cross.  However, the design doesn't include anything like that and I have now been asked to embroider a verse to go beneath the appliqued design.  The chosen verse is part of verse 4 of Psalm 100:
"Enter into his gates with thanksgiving, and into his courts with praise"
I thought I'd take the opportunity to do some goldwork again, although it has been a very long time since I last had a go.  Then, when I saw the applique design I decided against that idea and was stumped for a while as I wasn't sure goldwork would suit it.  I then came up with the idea of doing the lettering in blackwork, outlined simply and emphasising certain words with a bit of gold. However, once I got down to it and measured out the space I had and found a nice, clear font (with a bit of help from a colleague in the graphic design team - thank you George!) I altered the idea slightly.  I did like the idea of keeping it fairly graphic and simple, in keeping with the applique design, and decided to stick with the principle of black lettering.
After a bit of rummaging about, I realised that I still had some fabric left over from my first attempt at goldwork (back at school).  I'd made an ecclesiastical stole for my uncle's ordination. As I knew that the fabric held up well to heavy stitching etc it would be just the ticket.  And thankfully, there was more than enough of it left.
You may recall that last spring I attended a Royal School of Needlework course, so I'm going to try to follow a similar style for my lettering.   I've bought the perle thread, found my old stash of Japanese gold thread, purl and gold kid, found my course notes and embroidery stitch reference book, so I'm good to go. The fabric has been 'strengthened' with a calico backing and I've even invested in some charcoal sticks that I can ground down to make my own 'pouncing powder' to 'prick and pounce' the design onto the fabric. So now, everything else is on the back burner so I can concentrate on this for the next month or so.
Here is my progress so far - slower than I'd have liked unfortunately.

Wednesday, 10 July 2013

Royal School of Needlework - update

At the end of March I promised to let you know how I got on at the Royal School of Needlework on my 'Introduction to Embroidery' course, and here it is (finally).
Initially, I was a little disappointed as I'd interpreted the title differently and was expecting to have a little bit of everything else they offer, a sort of 'taster course'.  But the 'Introduction' is really that - and introduction to a few of the 'traditional' embroidery stitches like you may have learned at school or from your grandmother, such as chain stitch, back-stitch, french knots etc.
We were a group of seven, smaller than usual for RSN courses aparently (usually about 12), as this was an additional date, but in my opinion, the size of the group was just right as we all had the opportunity for some one-to-one and were all able to ask questions.  Our tutor, Heather, was lovely.  She is a freelance embroiderer - lucky lady! and regular tutor at RSN.  At the beginning of the day we all introduced ourselves and gave a little of our 'embroidery background'.  I was a little surprised that I was the only Friend of RSN on the course and also the only one who'd done much embroidery, although quite a few had done a little with their grandmothers when they were small.
We were all given a kit for a 'leaf' motif with each leaf being done in a different stitch and Heather demonstrated each different stitch by starting one of us off while the rest of us gathered round to watch.  As the day progressed and some of us stitched at a different pace, she showed us in smaller groups as we became ready to move on.  We had a tea-break mid-morning and were able to take a quick look at some of the school's library and their complete range of both DMC and Anchor threads and at lunchtime we were taken to the RSN shop ("child" and "sweet shop" are the words that spring to mind!) to pay for our supplies (and anything else that took our fancy, which was quite a lot really, but I managed to resist and 'only' bought 7 skeins of DMC and a pair of super-duper embroidery scissors so that my beloved Swiss army knife can retire).


There were five leaves in the original kit - one each for chain stitch, fly stitch, blanket and slip stitch, Van Dyke stitch and threaded back stitch - with some goldwork couching and french knots to boot.  Three of us got a bit enthusiastic and used the 'prick and pounce' method to add an extra leaf to our design and we chose to try trellis stitch (which I finished at home).


It was a brilliant day.  I was so enthusiastic and excited about my embroidery at the end of it and I can't wait to go back again and try another.  I think the natural follow-on would be crewel work, and I am tempted, but I really fancy blackwork.  It was the first time I'd actually be taught embroidery, as I'm self-taught really and it was such a privilege being taught by such an expert.  It was wonderful being surrounded by examples of fantastic embroidery too (some of Heather's and some apprentice pieces).  At the end of the day Heather also took us to see an amazing embroidered screen (middle row, right in link) in an adjacent room.  It is about 6 feet high and was completely covered in beatiful crewel work (loads of trellis stitch and millions of french knots, which actually looked like velvet or chenille). Being inside Hampton Court Palace was fantastic too, and although you couldn't really tell from the room we were in - climbing up the old stairs and peering out of the window at the Palace gardens made the day all the more special.  I wonder what Cardinal Wolsey, Henry VIII etc would think of us all wandering around 'their' palace in our modern get-up and picnicking on their lawn?!

Monday, 3 June 2013

A sight for sore eyes

I had a highly enjoyable day out with friends on Saturday.  We'd arranged it ages ago - thanks to the most organised of the three of us - but it came around really suddenly.

It started with an unexpected military escort!  I had plenty of time for once, so I thought that I'd get off the tube one stop early and walk through Green Park to the Queen's Gallery instead of going to Victoria and walking along a load of grey streets.  However, that was a really bad idea as Saturday was the Queen's Coronation celebrations and all the Piccadilly Cowboys (or the Royal Horse Guards as I believe they are called officially) were lined up in their finery outside Buckingham Palace and it was impossible to cross the Mall from Green Park to the Queen's Gallery.


So, after a brisk walk around the boudary of the Queen's back garden I met my friends outside the gallery to see In Fine Style: The Art of Tudor and Stuart Fashion.  It is mainly paintings from the Royal Collection, but there are also some beautiful examples of items of clothing from the period and the whole exhibition clarifies and explains the fashions, they whys and wherefores etc of Court clothing.  The Queen's Gallery isn't a huge gallery and I could quite happily have seen twice the amount that was on show.  Nevertheless, we spent a few delightful hours looking at wonderful paintings and drooling over amazing needlework ranging from Cavallier lace collars to Henrietta Maria's hand embroidered (tiny) slippers to coats of armour.  My favourite item, I think, was a stunning lady's waistcoat embroidered with scrolling leaves and roses, rosehips, bluebells, periwinkles and other beautiful flora and fauna. The condition was fantastic and the needlework was outstanding.  There was a short film included in the audio guide to the type of embroidery on this waistcoat and the professional embroideress giving the demonstration said that she couldn't do that type of work under the conditions of that period full time!  I just HAD to buy myself the exhibition catalogue to drool over in my own time, along with a spoof 'Vogue' magazine, called 'Robe' - hilarious.

The young Elizabeth I
Charles II in his first 'grown up' suit - with his siblings
Amazing detail by Rembrandt
After a civilised lunch in St. James' Park we headed south to Bermondsey to the Museum of Fashion and Textiles to see the Kaffe Fassett exhibition.  I've a couple of his books (Glorious Needlepoint to name one), so it was fabulous to see his work, including many of the items from his books.  I must admit that I'd 'lost touch' with his work recently and hadn't realised that he'd branched out into quilting too.  I'm not a great knitter, so this was a real treat for me.  As you can imagine, if you're familiar with his work, it was a riot of colour and bold in all senses of the word.  Unfortunately, my camera battery had died by then, so I've only some poor quality mobile phone photos for you.


Sunday, 14 April 2013

Snowdrops

At the beginning of the year I told you about commissions I'd received.  I must admit that it has taken me longer than I expected to finish the first.  Well, I've finally started work on the second.

It is an embroidery of a poem written especially for a friend of my BIL's when she was presented with a special award at the Welsh National Eisteddfod.  Her name means 'snowdrop' in Welsh, so he's requested a snowdrop border for it.

After much searching in books and online, I finally fell for this Art Nouveau one from this book.
My needlework book collection - well, some of it!
And for those of you who aren't very familiar with plotting cross stitch charts, this is the process I followed:

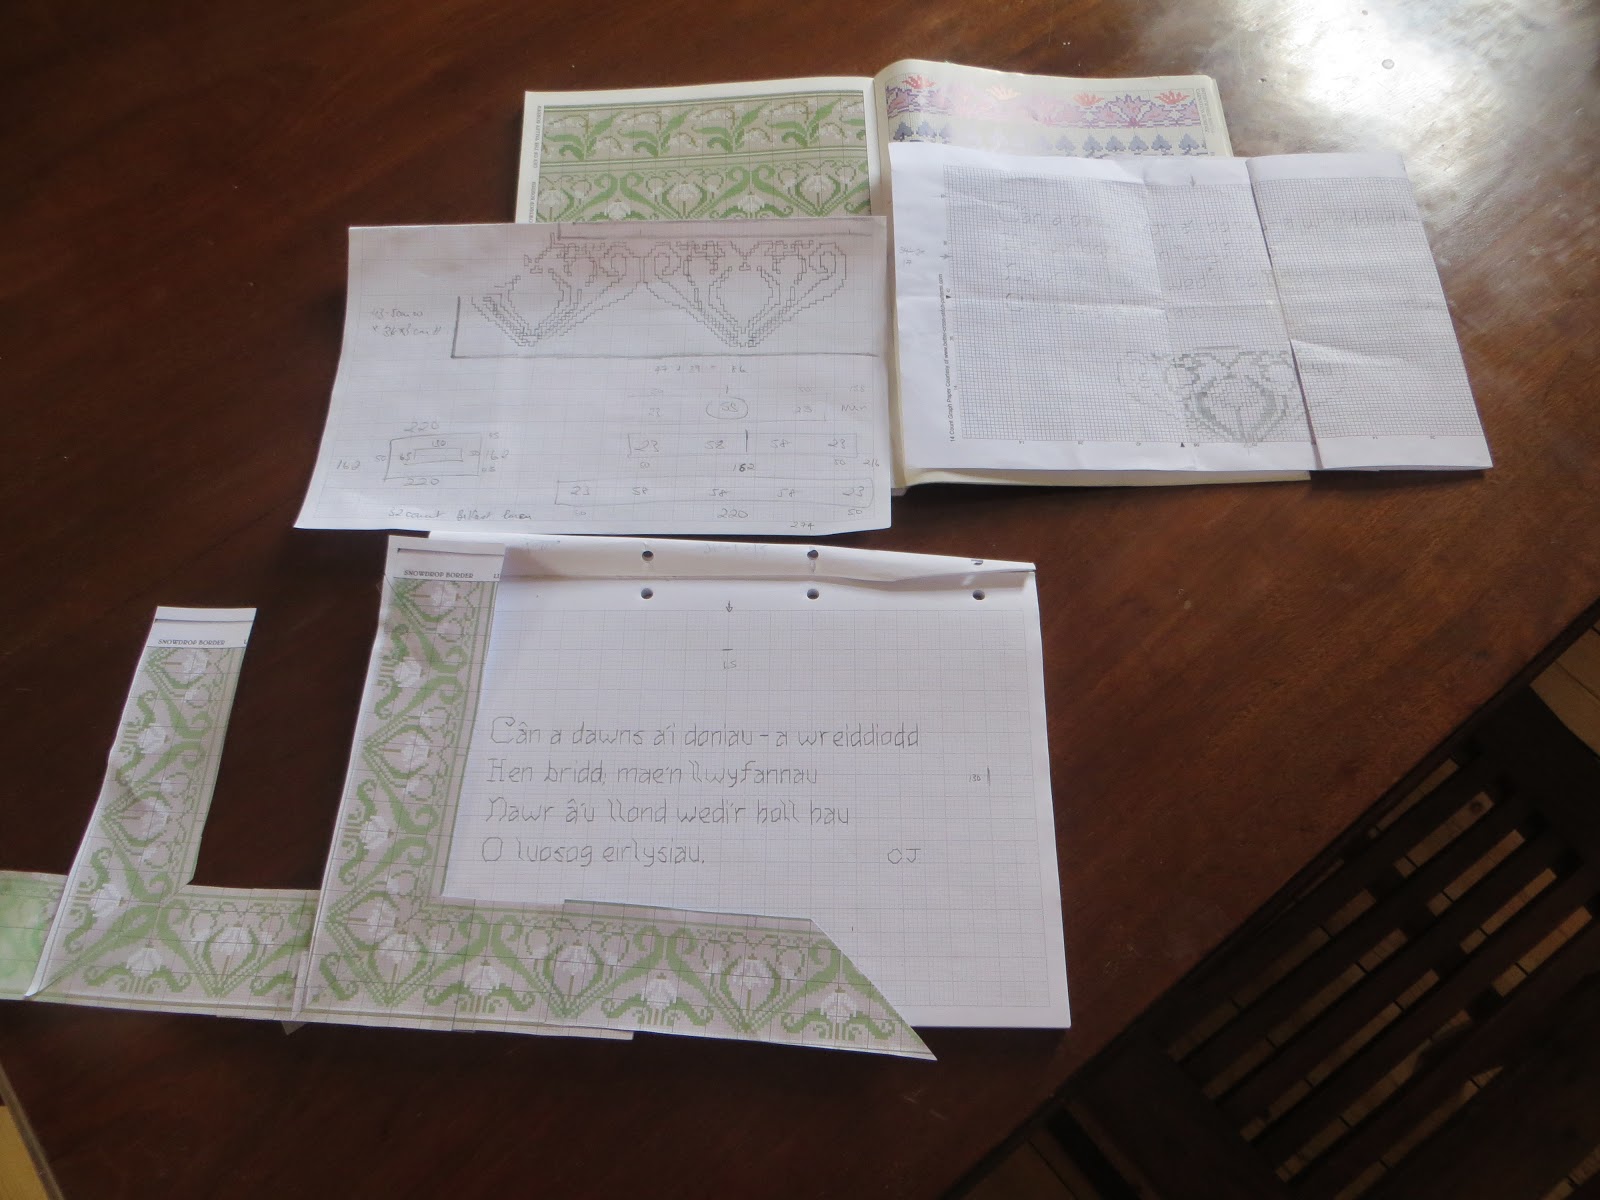
After choosing a font I liked, I plotted the words of the poem on grid paper.  Once I'd finished that, I worked out the centre of the poem (dividing the number of squares the width of the words takes by 2 and ditto with the height of the words) and marked that on the chart.

I photocopied the chart of the border a number of times and played around with them to get the best option for turning corners (IMHO, of course).  I also decided which part of the design worked best at the 'centre' so that I could line this up with the centre of the words.

Photocopies of the border used to try out different 'corner' options (with plotted poem)
With all of this decided, I copied the border (as the photocopies weren't on the same scale as my chart for the poem - bad planning on my part and I expect there would be a way of photocopying to the correct scale or choosing the correct scale grid paper for plotting!) to work out the scale in relation to the poem.  I then 'played' around a bit with the border in relation to the words to work out how many times the motif would fit across and up the poem in order that I could try to work out how much space there would be around the words.  Being totally honest, I had got quite confused by this point was loosing interest in it all.  I ended up 'guess-timating' 3 motifs across and 2 up, plus the corner and came up with 3 full plus two 'halves' along the top and bottom; 2 full plus two 'halves' up each side.  If you're still following - congratulations and stick with me a bit longer.  If not, I hope some photos will help clarify things a little.
Up-scaled border motif with poem
My bits of plotting, calculations and jottings
To cut a long-ish story short, with all those calculations done I realised that I needed to find a larger font for the poem as there would be far too much 'white' space around it otherwise!

Anyhow, with all of this done (phew, time for a well-deserved cuppa and biscuit I think - for you and me!) it was time to work out how much fabric I needed.  Thankfully you can find help with this online like this for example.

I've decided to go with an evenweave fabric as a) I prefer it, b) I think it will suit the style of the border better and c) I think the recipient will like it and it will suit her decor (from what I know of her).

As for the colours, well, for once, that was a little easier to decide on than the rest.  Firstly, snowdrops are white and green - easy.  And secondly, the lady in question leads a dance group and the group's signature colour is purple.  So, the border in white and green and the poem in purple (which thankfully goes quite well with green and white - lucky that!) on a natural linen background (so that the white of the snowdrops shows up nicely).

So, off I go .....

Monday, 4 February 2013

Pay it forward 2013

Since the New Year I've noticed quite a few posts on Facebook about this. If you haven't come across them, they say something like this:
Pay it forward 2013!
I promise to make something handmade for the first five people who comment.  They must in turn post this and make somthing for the first five who comment on their status.
* The rules are it has to be made by you, and they must receive it before 2013 ends.

Initially I thought, I've more than enough to do as it is and I don't want to feel under pressure to make stuff.  But the more of these posts I saw, the more I thought about it.  And as I've been merrily stitching some little objects recently, I've realised that they don't necessarily have to be huge undertakings (and you'll more than likely have to consider postage for them too).  So, as a 'crafty' person, I've been persuaded to give it a go after all and posted my message on my FB page last week.  I've had a few takers - one for a charity my friend supports - and I've already a fair idea of what I'm going to make those who've shown an interest.

I suppose, now it will just be a matter of getting on with it (although, I do have best part of 11 months to give them to my friends!).

Monday, 17 September 2012

The world is your ... embroidery kit?!

Don't you just love holidays?  Travel is one of the many things DH and I have in common.  He's done a lot more of it than I have, but we both love it.  We've both lived abroad too and would love to give that another shot sometime before we're too old.

Over the years we've both collected lovely souvenirs from our travels and our home is decorated with many of them.  I must admit that DH has a very good principal when it comes to buying presents and souvenirs - get something that someone can use or need/want, rather than just buying for the sake of buying and the item collecting dust in a cupboard somewhere.

Since being together we've bought a beautiful rug (India), a St Bridget cross and butter dishes (Ireland), garden lantern (Wales) and a Benjamin Franklin quote print (Philadelphia). We also have Chinese script, south American textiles, African masks, Aboriginal artwork, Czech prints and a few Christmas tree and Easter decorations from our various solo trips.  We do tend to buy a tea towel or two while we're at it too and in our collection there are some from South Africa, Ireland, Belgium, Sweden, Brittany, the London 2012 Olympic Games and Australia.

I love to try to buy embroidery magazines while I'm abroad too, as they are often slightly different to what you'll find here.  But my ideal souvenir is to find an embroidery kit that shows something typical of the country I'm visiting.  It isn't always easy though, but I have managed to get a lovely May Pole from Bavaria, a banner of typical/well known Norwegian buildings, a Swedish Christmas banner, a map of Brittany and some Quimper faience pattern 'samplers' and I also have a provencal table cloth from a visit to my cousin when she lived in Toulon.
Bavarian may-pole - when I replace my camera I'll add a better photo!

Map of Brittany by Philomène

Greetings from Norway - typical buildings


Provencal table cloth and napkins
We were fortunate enough to be in New York for a week when the Icelandic volcano struck and caused havoc with international travel.  What hardship to 'have' to stay there for an extra week!  During the second week I discovered a lovely little embroidery shop around the corner from where we were staying and I went to see what I could find.  I discovered an embroidery 'designer' called Prairie Schooler which has a lot of folk-art style designs.  In the bargain bucket I found "A Prairie Year II" booklet - 12 designs, one for each month of the year - which I thought would be quite practical for a pretty, quick stitch as a card or small gift.

Before leaving NYC, I showed the booklet to our hostess and asked whether she'd like one of the designs and promised to send it to her once I'd finished (with the caveat that I'd no idea how quickly I would manage it!).

It is just as well really, as I saw her again a fornight ago - for the second time over here since our visit there in 2010 - and realised that I still hadn't finished her design.  Well, to be honest, I finished embroidering it ages ago, but haven't made it up into anything yet.  I'd also embroidered another two designs, one for Christmas (but that hasn't turned out as successfully as the other two as the background fabric is a bit pale) and one with a beehive design for another couple we know who keep bees.  I've filled them both with dried lavender so they not only look pretty, but they also smell heavenly. 
Prairie Schooler lavender bags

Yet another UFO to tick off my long list.  How do you think they turned out?

Thursday, 13 September 2012

Let's start at the very beginning...

The other day, when I was writing about UFOs, I was looking through a zip-lock bag I have of bits and bobs I've made - you know the type of thing, a free kit from a magazine, a cute kit you've fancied but once made up you've no idea what to do with or where to put it ...  Well, in amongst all of this I found some of my earliest embroideries and thought that I'd share them with you.  Hopefully you can see how far I've come since I started!!

My very first project was this tray cloth.  I found an old biscuit tin filled with embroidery silks that belonged to my maternal grandmother and it was that that triggered my obsession with embroidery.  She died a little over a year before I was born and had left this tray cloth unfinished.  So with her help, it started my 'career' with embroidery.  No prizes for guessing which part my Nain did and which is mine!


After finishing it, we showed it to my grandmother's sister, also an excellent embroideress, and the following Christmas I got the kit for this tray cloth from her.
The following pictures are pieces I made at school at various times - I'm sure you all recognise the style!  Unfortunately, I'm really showing my age with some of these!!  I'm not sure whether it was while we were sewing the top or the middle one, but my class had taken our chairs outdoors as it was so sunny and were sewing outside our classroom when one of the boys realised he'd sewn his 'sampler' to his shorts!  I wonder whether that was the end of Ben's sewing career?!


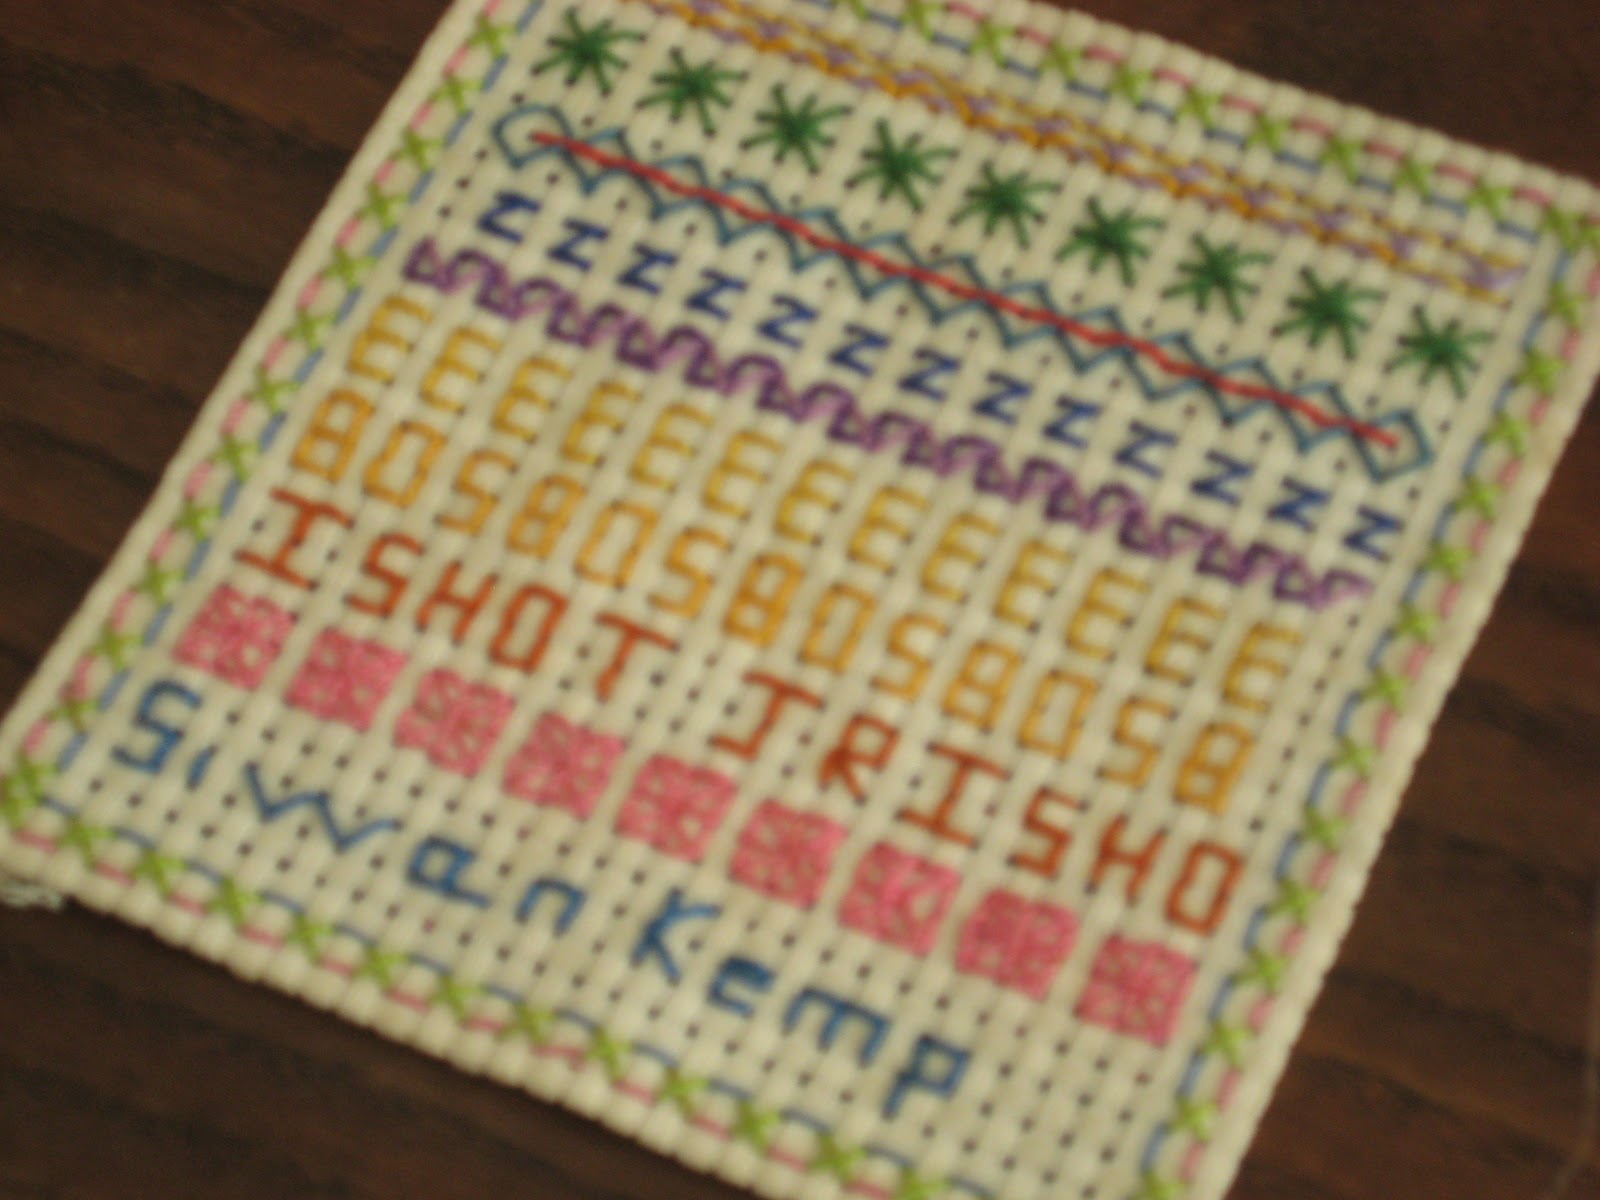
I also remember my DM being mortified when she saw the middle one and asked me to unpick some of it, but I never did.  I was so fed up with everyone discussing who they thought had shot JR in Dallas while we were all sewing that I lost my rag and 'confessed'!!  I suppose it dates it and is quite apt now, as the new series has just started over here.

PS: apologies for some of the slightly blurry photos - my camera isn't well and focussing is a bit of an effort.  I suspect it isn't much longer for this world.