Tuesday, 26 August 2014

House tour - part 4

Shall we go upstairs?!

Sounds a bit saucy doesn't it.  But actually, almost everywhere in our house is 'upstairs'.  From the front the house looks like a pretty average mid-terrace house with a bay window upstairs and down.  But at the back there are three floors!

So, we have about 6 stairs from the kitchen up to the entrance level/living/dining.  Then from the entrance level there are another 7-8 stairs up to a bedroom, bathroom and WC.  Then another 7-8 stairs from there up to another two bedrooms and then up another 4-5 stairs, finally to the top floor and another bedroom and box room.  It was exhausting when we first moved in, but we're used to them all by now.

The main difference upstairs is really the master bedroom, en suite and landing.  We had some board put down in the attic and in the process the top landing ceiling collapsed (not completely unexpected!).  So that was re-plastered and we replaced the attractive shelving around the water tank with some more practical cupboards.
Landing ceiling - beforeLanding ceiling - after
The en-suite was reasonable, but a vile colour.  However, we decided against keeping the bidet and replaced it with a shower cubicle, so the whole suite was shuffled around a little to make it work better.

Before - in germolene pink

Now - nice and calming

In a similar fashion to the water tank, the 'wardrobes' in the master bedroom had been rails hidden behind curtains, so Mr Door-man was employed again to build us some wardrobes.  His and Hers, either side of the (original!) fireplace.
It was great to find a house that our furniture would fit into.  We'd seen so many flats beforehand (and some VERY nice ones) that were only just big enough for our king-size bed (a collective wedding present) so that we'd have had to use the other bedrooms for wardrobes, chests of drawers etc. 

Thanks to our holiday in Turkey last year, we're a little closer to how we want this room to be now.  We've 'just' got the curtains to make and then choose a more suitable rug.  I have a feeling you may hear more about these curtains in the future!

Friday, 15 August 2014

Sing a song of sixpence ...

A while back I saw a Miss Marple episode called 'Pocket full of rye', which brought the old nursery rhyme back.  I don't really know why, but despite being a Welsh speaking family, I don't really remember many Welsh nursery rhymes from my childhood.  We were living in Chester at the time, so that is, presumably, part of it.

Anyway, if we 'sing' the whole nursery rhyme, we might get to the topic of this post ...
Sing a song of sixpence,
A pocket full of rye.
Four and twenty blackbirds,
Baked in a pie.
When the pie was opened,
The birds began to sing;
Wasn't that a dainty dish,
To set before the king?
The king was in his counting house,
Counting out his money;
The queen was in the parlour,
Eating bread and honey.
The maid was in the garden,
Hanging out the clothes,
When down came a blackbird
And pecked off her nose.
And before you ask, no, I'm not going to give you tips on catching blackbirds, or baking pies, but rather show you how I went about making a peg bag for my parents.

Many years ago I made a peg bag for my parents, which is now literally falling apart at the seams.  A little more recently (but not a lot) I made another with some cross-stitch decoration.  Unfortunately, this one is too small to hold all of DP's pegs, so I've combined the size of the old one with the design of the second to make another for DPs.

I wanted a finished bag that was the width of a standard coat hanger (the hanging 'mechanism' for DP's 'dying' peg bag and approximately 35cm) by 45cm long, so I cut a piece of fabric twice this length plus 1.5cm for each seam allowance by 45cm wide plus seam allowance. To add a bit of strength and give a better finish, I also cut another piece the same size in a plain 'lining' fabric.

I had decided to make the opening 15cm down from the hanger, so I measured 15cm plus the seam allowance from one end of the outer fabric and centrally marked a horizontal line the width (also 15cm) I wanted for the opening.

As I wanted to embroider around this opening, I then tacked some scrap embroidery/tapestry canvas onto the right side of the fabric to act as a guide for the cross-stitching.  Unlike the original bag, I decided to pick out two colours from the fabric and embroidered the design beneath the opening in one colour and the text in the other and then alternated the colours for the peg designs either side of the text.

Now that the embroidery is complete, with the right sides of both fabrics together, I sewed a narrow rectangle around this horizontal line.  I then drew lines diagonally from the central line to the corners of the stitching, to mark the cutting lines.  Carefully, I cut through both layers and press the seam allowance towards the lining fabric.  If possible, understitch the seam allowance to the lining as closely as possible to the seam.
Pulling out the softened waste canvas - took FOREVER!

Now turn the fabrics the right sides out.  Fold the lining fabric up in half, pin and tack and stitch up the two sides and trim the seam allowance.  NOTE - don't sew across the top of the lining yet! You could sew a slightly wider seam allowance on the lining so that it is a fraction smaller than the outer bag and thus reduce some of the bulk in the seams.


Next, pin and tack the outer fabric, right sides together, and stitch up the two sides (with a slightly narrower seam allowance than used for the lining, again, trim the seam allowance.  You should end up with two bags attached at the opening, a bit like 'conjoined bags'.
Understitching the opening of the bag

After pressing both sides, turn the outer fabric bag right side out, over the lining bag.

Carefully, fold down the top section of the outer bag to free access to the lining bag.  Insert the hanger just inside the lining and pin/tack the seam allowance along the curve (if it has a curve) of the hanger.  Carefully stitch along this line, taking care not to damage the machine/needle with the hanger!  Trim the hem.

The outer bag can now be unfolded over the rest of the bag.  Turn the seam allowance in along the upper edge of the hanger and hand stitch (slip stitch) closed.

Et voilĂ !

Monday, 4 August 2014

A 'blinding' cushion!

With all my repairs and mending out of the way now, I have no excuse to avoid getting on with a new blind for the kitchen.  As you know from ..... after replacing the windows I had to alter most of the blinds to fit the new frames.  Unfortunately though, one blind was just too short and too narrow for the new window, so I had no choice but to start from scratch.  Thankfully when we ordered the fabric we didn't realise that we'd be able to get two of the bay window blinds out of one length of fabric - so, we have enough spare for the new blind :-)
Trying to decide how I want the stripes to lie
But I really didn't want to waste the old blind (must be something to do with being brought up with parents who grew up during WW2!).  So I've decided to unpick it and use the fabric to make a cover for a cushion for our 'new' pew in the kitchen.

Following the advice of my friend, Bette Noire, I bought 2" thick 'recon' foam and 1" thick foam for the top layer. It was an added bonus that the supplier (amusingly called Pentonville Rubber!!  I've had such fun posting my visits on Facebook just to see what comments I'd get!! ;-)  ) was able to glue the layers together for me, and save me a job. With an electric carving knife, I cut the two layers to shape along the front edge - fun but bizarrely difficult to keep it vertical, so they're not perfect, but hopefully once covered no-one (unless they read this) will be any the wiser.

I made the top and bottom to match with the stripe going along the width of the bench/cushion and cut the strips for the sides along the stripes too, rather than across them.  It would mean that I'd need to be careful to stitch them carefully so that the stripes don't end up wonky though!

The edge strips were cut to be long enough to go around the front edge, the two short side edges and part-way around to the back edge.  The remaining gap would be made up of two strips, half the width of the whole so that a zip can be incorporated.  Unfortunately, getting a long enough zip in the right weight was a bit more difficult than I expected, so I decided to buy two.  It was a case of a) getting all the materials ready so that when I had the time, I could just get on with the job, and b) thinking (or hoping) that it may actually make life a bit easier to have two zips that meet at the centre.  We shall have to wait and see.
The zip section ready to
be added to the edge piece
I was undecided about what to do about the piping.  I was torn between having a contrasting bias binding (red or green - undecided there too) and making my own out of the same fabric as the rest of the cover.  In the end, I decided to stick with the stripes as a) I didn't think I'd be able to find the right shade of red/green bias binding and b) I had enough fabric left over.
First round of piping complete
Again following Bette Noire's advice, I practiced applying the piping on some scrap fabric as I'd never quite managed to get it right in the past.  It was a fiddle, but following a few attempts I decided to give it a go on the real thing.

It isn't perfect, but I'm quite pleased with the outcome.  And the pew is a lot more comfortable now :-)
Blinds and matching cushion on our chapel pew,
with matching collection box (hanging on the wall on the left!)

Tuesday, 29 July 2014

House tour - part 3

Hi remember me?  Probably not as it has been so long since I've been here.  Sorry!  It's been a bit of a manic few months, but I hadn't forgotten about you - honestly!  So, while I get myself back on track a little, here's a little tit bit to keep you going.
**********************************

In my last 'House tour' instalment I told you about the big building work in the kitchen, but also mentioned that the other 'heavy' work happened downstairs, in the living/dining rooms.

We didn't want to do away with the wall between these two rooms completely, but we did want the flexibility of being able to use them as one room if we wanted.  So we opted for a doorway between the two rooms. 

Initially I fancied getting some reclaimed doors and to build the doorway around them, but it wasn't quite as easy as it sounds.  In the end, we had bespoke doors made and are very pleased with the result.

We're both keen readers and have lots of books, so it was essential that we had plenty of space to store/display our books.  In fact, for DH it was more than essential (if that is possible!).  The two alcoves either side of the fireplace in the living room were perfect for some bookcases.  We looked at ready-made ones and couldn't quite find what we'd pictured in our heads for a price we could afford and so the 'door man' also built these for us.

So, here is (more or less) how our living room looks now:


And our dining room:

One day we'll have the original French windows in the dining room restored too.  They're far too nice to replace, although we've yet to decide whether or not to have a little balcony or some stairs leading down from them into the back garden (who's idea was it to remove the originals?!?!?).

Monday, 31 March 2014

Sewing Revolution

Although I've been a bit distant here, I've been trying to do a bit more social media and have started tweeting a little (@SiwanH in case you want to know!) and have one of this year's contestants has been tagging #sewingrevolution.

So last weekend, I took inspiration from the 'revolution' and got on with it. Having finished the kitchen blind to complete the collection (most of the job was DIY as I'd done most of the sewing already).  Once that was up, I braved a new concept for me - upcycling.

I've never been all that confident at altering clothes, so the thought of somehow reusing the fabric from a garment to make something completely new was rather daunting.  But having been brought up by two war-time children, I find it difficult to throw something out that may have a 'second life', and I've been piling up DH's worn out work shirts for a while in the hope I'd be brave enough to make something out of them.

Not wanting to start too big, I opted for Colette's Sorbetto top - a popular pattern from what I've seen online and a favourite of Lauren from last year's Sewing Bee - and also my first foray into online patterns.  Having taken my own measurements, compared them to the chart with the pattern, I traced the correct size onto tissue paper.  Not as difficult as I'd expected :-)  I then made up a toile out of some left over curtain lining fabric (or something) to see how it suited.  And apart from being a bit loose, it was ok.

Ok, I admit, I did have a bit of a melt-down with DH because I couldn't work out how to alter it to stop the armholes gaping.  But a cup of tea and a hug (or two or three, or four!) later, I retraced a smaller size and started again, with a better result.  The fit still isn't perfect, but it is at least passable.

So, on to the Real Thing.  I chose a shirt and tried fitting the pattern onto it.  I knew that the pleat at the front may have to be sacrificed, but in the end I opted to keep the buttons/placket and move them to the back and have a plain front.
trying to decide which binding to use

Almost finished (except for some girly buttons)
So, now it is onwards and upwards.  I'm certainly going to give the pattern another go, although I'm going to try and alter it slightly by moving the darts to a better position for me.  So it is just a question of which shirt I should upcycle next?

Thursday, 27 March 2014

Commission update - Snowdrops

Along with everything else in my life recently, my commissions have taken a bit of a back seat.  But with the New Year, new-found energy (if it lasts!) and getting rid of my back-log of odd jobs, I'm getting determined to get back on track with the last commission of 2013.

My last update about it was months ago.  So HIGH time for me to be getting on with it again.  Over Christmas I was, at least, able to touch base with the commissioner, and I think they were rather surprised that it was as big as it is.  In fact, I suspect they hadn't expected me to go to quite so much trouble with the border (which is going to be quite prominent).

Progress has been slow until fairly recently, but I'm now fairly happy with how it is coming along now. Getting the first corner right was a little complicated and took longer than I'd expected.  I had made two versions of the chart to see which looked best, but even so, when it came to stitching it, it changed slightly. I'm a little disappointed that there isn't more of a contrast between the fabric and the white of the snowdrops. I'll have to see how it goes, but I may end up outlining them so they stand out more.

I'm expecting the stitching of the poem in the central space to be quite a quick job after the wide border though.  Let's keep our fingers crossed!

It is a good feeling to have turned a corner (excuse the pun!) and realise that I'm over half-way through the border now.

Tuesday, 25 March 2014

House tour - part 2

Following on from an earlier post, here's more on our renovations.

Downstairs, or the reception rooms is where the majority of the heavy work was done.

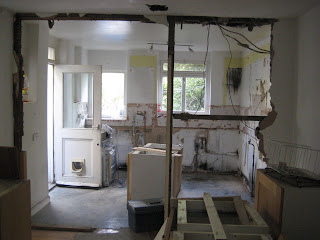
Originally it was four rooms - living room, dining room (or study, as the vendors had it), breakfast room and kitchen.  The kitchen was pretty small and dark.  I later discovered that the kitchen would originally have been three rooms - a (very) small kitchen, a pantry and an outside toilet - that had been knocked into one.  But for us, it was still too pokey, so we decided to knock the wall between the kitchen and the neighbouring breakfast room down to create one large room.

The original kitchen
The breakfast room
The work in progress!
This was a huge job and took quite a lot of time, but eventually it was ready for the new kitchen units and appliances.

It faces north, so I was concerned about light in the room and opted to go for light units and light wall tiles.  Not a common combination these days, but we'd seen a very similar kitchen in New York and it looked great.  It was MUCH smaller and also had light floors and work surfaces, but we decided to go for a bit of contrast to vary things a little and chose a wooden work surface (which hopefully reflects the floor boards in one half of the room).  We decided that the 'work' end of the new kitchen, which had been the original kitchen, would have a tiled floor and that way we would also 'show' a little of the house's history by delineating the two rooms we'd knocked into one.

If you've been reading this blog for a while, you will know that one of the earliest 'house' posts was about the blinds I made for the kitchen, which were recently altered to suit the new windows installed last spring, so it now looks like this.

Monday, 17 March 2014

Great British Sewing Bee - series 2

I am so thrilled that this series has returned.  I'm falling in love with it all over again!

And I'm getting itchy (treadle) feet again and want to get back to making my own clothes.  It has been YEARS since I made any clothes for myself, so this may well be just the ticket to kick-start things again (once I've finished the million and one other tasks and WIPs on my ever increasing list of course).

I don't know if any of you have ever bought Sew! magazine.  It was new to me and I was drawn to it by the free pattern (New Look 6144 in the current issue).  I was even more tempted when I read the item inside about the Liberty print version they made - at about £14 per metre (may sounds a bit dear) - actually means the dress would come in at about £30.  A LIBERTY DRESS FOR £30!!!!  Even DH was convinced when I pointed the figures out to him :-)

Now, being of an insecure disposition, I'm wary.  Do I take the plunge and buy fabric and go for it?  Or do I 'um' and 'ah' about whether I should give it a go. Will it suit me when I've made it?  If it doesn't it will be wasted time and money and I'll feel miserable that I won't have a lovely new dress at the end of it after all, and feel even more insecure to boot.  I suppose I could compromise and make up a toile before taking the plunge properly.  But then, you can't easily adjust the fit on yourself (and there is no hope of getting dear DH to help with something like this!).

That has always bothered me about sewing your own clothes.  You buy patterns, fabric and all the notions.  You spend time and effort cutting out, tacking, pinning and sewing together and then when you're all excited, you try it on and the fit isn't right or the style makes you look like a sack of potatoes.  It would be so much easier if you could try it on before you buy.

If only May and Patrick and all the Sewing Bee gang were on hand to help!

Tuesday, 4 March 2014

Reading again

The other day I was updating my reading list, wracking my brains trying to remember what I've read over the past few months, and I realised I hadn't let you all know how I've been getting on with it either.  And you deserve a sign of life from me again!  And looking back over it, I've left it some time too.

So here are the additions to my first and second lists:
The Hobbit - JRR Tolkien (I last read this at primary school, but wanted to refresh my memory before watching the first installment of the film trilogy.  I'm glad I did - the film was so long, at least I knew which bits had been added so I could pop out to powder my nose without missing anything crucial!)
Wessex Tales - Thomas Hardy (I fancied returning to an old favourite, but picked something I hadn't read before)
The Phantom - Jo Nesbø (another go at reading a Harry Hole novel.  It went a bit better than my last attempt)
Heartbreak Hotel - Deborah Moggach (A gift from my MIL.  We watched Best Exotic Marigold Hotel together and were joking that Deborah Moggach should write something about a hotel in Wales ... and she must have been listening!)
Hanas Gwanas - Bethan Gwanas (a Welsh writer and broadcaster.  This is her autobiography - it made me laugh and cry - fab)
Dyddiadur Gbara - Bethan Gwanas (I then went on a bit of a Bethan-fest didn't I? She spent two years after uni doing VSO in Nigeria.  This is her diary of her experiences)
Yn Ă´l i Gbara - Bethan Gwanas (S4C filmed her returning to the village in Nigeria where she lived 20 year on - this is her diary of the journey)
Byd Bethan - Bethan Gwanas (this one and the next are some of her columns for the Welsh Herald)
Mwy o Fyd Bethan - Bethan Gwanas
Ar y Lein Eto Fyth - Bethan Gwanas (The book to accompany her S4C series about following various 'lines' around the globe - this one is the Equator, but she's also done the longitude of her home town, Dolgellau and from pole to pole)
My name is Red - Orhan Pamuk (This was about Istanbul in the time of the Sultans.  He won a Nobel Prize for Literature)
Istanbul - Anthology (another gift from MIL for our holiday last year in Turkey)
Death comes to Pemberley - P. D. James
The White Queen - Phillipa Gregory (I had to read this trilogy in preparation for the TV series)
The Kingmaker's Daughter - Phillipa Gregory
Tulip - Anna Pavord (the history of tulips)
A Commonplace Killing - Siân Busby (Siân was a member of our choir and grew up in the same part of London as DH and set this book there too.  Very moving as she died shortly after completing it, but before its publication)
Innocent Traiter - Alison Weir (I have an obsession with Jane Grey, so I had to read this)
Wolf Hall - Hilary Mantel (I was on a bit of a history fest!)
Cathedral of the Sea - Ildefonso Falcones (inspired by our trip to Barcelona in November)
Miss Smilla's Feeling for Snow - Peter Høeg (As I'm rather partial to Scandi-lit, I thought I'd give this a go, but struggled to stick with it.  I don't think I'll bother with anymore of his books)
The Follies of the King - Jean Plaidy (I felt I need to know more about this period after we saw David Tenant in Richard II.  I hope to track down the following novels in the series before we see Henry IV parts 1 and 2)
Aderyn Brith - Rhiannon Gregory (based on the life of a Breton miller's daughter who rose to become courtesan to a Prince and then wife to an industrial mogul)
The Kashmir Shawl - Rosie Thomas (a lovely story connecting India and Wales)

Goodness - I've just realised that it is more than a year since I filled you in on my reading escapades!  Sorry!  Count yourselves lucky that I had a bad autumn for reading, or this post would be even longer. ;-o

I must really get back to some books that I've started but haven't managed to finish now and let you know how I get on (if I don't get distracted by other books!):
A short histoy of Nearly Everything - Bill Bryson
From the Holy Mountain - William Dalrymple
Y Trydydd Peth - Siân Melangell Dafydd
Eine Frau in Berlin: Tagebuch-Aufzeichnungen vom 20. April bis 22. Juni 1945 - Anonyma (the diary of a German woman living in Berlin as WWII comes to an end and the Russians flood in. Fascinating, but hard going, especially in German.  It caused such an uproar when it was first published, that it was published anonymously)
The curious gardener - Anna Pavord (this is a 'dip in and out' type of book about stuff to do at various times of the year in the garden.  Maybe now that there are signs of life in the garden again, I'll start dipping into it again.)
Life of Pi - Yann Martel (I'm not sure why I didn't finish this!  LOVED the film though.)

Tuesday, 18 February 2014

Catching up on life - part 3

It has been a great feeling seeing the backlog of jobs gradually diminish and I really do feel that I'm really getting somewhere with my sewing jobs this year!

But back to the task in hand - my next job was a little more demanding and I did ask our local dry cleaner for her advice.  It is a tunic belonging to DS and the fabric on the sleeves at the sleeve seam had pulled. DH's opinion, when I showed him the damage was 'it's dead'! I hope I'll prove him wrong ;-)
damage from the inside with patch tacked into place
Patch now stitch into place
So, before resorting to removing the sleeves completely, on the dry cleaner's advice, I unpicked the facing on one of the sleeves to use as patches to cover the 'holes'.  But before cutting it up for patches though, I made a pattern out of it so that I'd be able to replace it with some other fabric.  And in the hope that it wouldn't be quite as obviously patched, I unpicked part of the shoulder/sleeve seam so that the patches would become part of the seam (and also hopefully strengthen the area so that the same problem doesn't arise again).  I just hope that DS approves and didn't mind not being able to wear it last summer because I've been so slow.

Hopefully restored to use
Inspired by the success of this task, I'm going to try to repair a couple of table cloths we'd managed to burn holes a couple of Christmases ago and 'canibalise' some matching napkins for the patches.


[photos of repairs]

Now all I need to do is declutter the sewing room (again). I've got some left-over Liberty print fabric that I intend to make into some pretty handkerchieves.

But I'll leave those for another day/post and keep you in suspense!

Monday, 10 February 2014

Chuffed

Tidying the cupboard under the stairs (which is actually the stairs to the cellar) has been on my mind for some time and after a fair bit of research, followed by brainstorming with DF and a trip to good ol' Ikea, I felt that this weekend was finally the time to bite the bullet and try out my DIY skills. So after going over it in my head a few times and a trip to Homebase on Saturday morning, here is the result ...

It is still a work in progress (I ran out of screws!) but I think it is already much neater and Skirtingboard Siw is back in action!!

On a completely different note, here is some more of this weekend's handiwork by Yours Truly.

Tuesday, 28 January 2014

All that glitters ...

In a recent (exciting) post about odd jobs, I also mentioned giving myself a treat by making some Christmas decorations out of some supplies I'd had lying around for ages and ages.

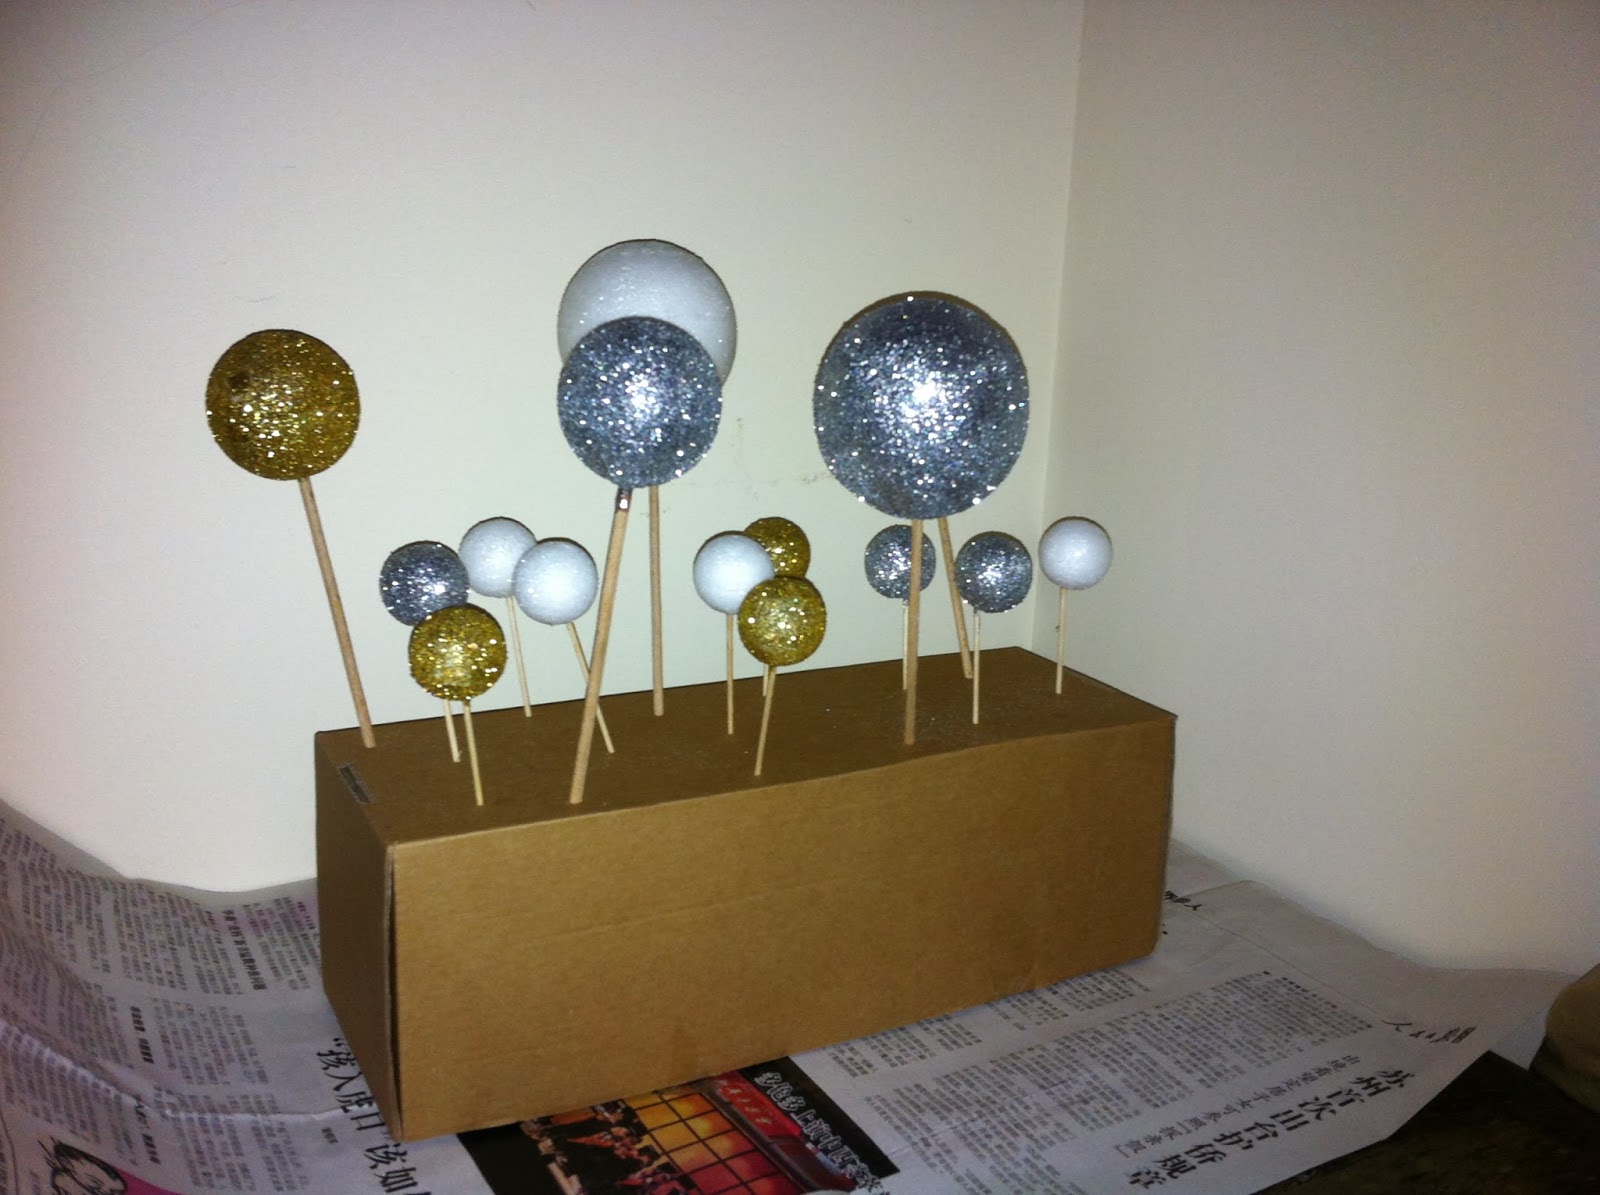
They were inspired by seeing an episode of Kirsty's Crafty Christmas and are really quite quick and easy to make.  All you need is:
Polystyrene balls
pva glue
brush
wooden skewers and/or cocktail sticks (depending on size of ball)
glitter
bowls (to hold the glitter)
spoons (to spoon the glitter over the balls)
loose cover pins (for upholstery)
ribbons
old box


  • First, use your skewers/cocktail sticks to make holes in the box ready to take the balls once they've been glued and glittered. Allow enough room between them so that the balls won't touch each other (but if you miscalculate, don't worry too much, you can always angle them away from each other)
  • Next, skewer each of your balls ready to start painting the glue over them.
  • Now the messy part starts.  Cover your ball with pva glue.  Try not to put too much glue around the base of the skewer or it may prove difficult to extract the skewer - but you want to ensure good coverage once the glitter goes on.
  • Holding the skewer, you can now dip your sticky ball into the glitter.  I put mine in various dishes and found some worked better than others, eg ramekins were a little too small and glitter ended up going over the sides.  Round sides (eg pudding/mixing bowl) worked well as you can roll the balls in the glitter.  It is also useful to have a teaspoon to hand to spoon glitter over the bits you can't dip in or any bits that get missed.
  • Once the ball is completely covered in glitter, tap the skewer against the bowl to remove any loose glitter (I think you can do this quite hard as I still 'lost' a bit of glitter later in the process) and then push the skewer into your box to let the ball dry.  This should be at least overnight.

  • Next day, remove the skewered ball from the box and spray with hairspray to set the glitter.
  • Now you can embellish them.  After removing the skewer I pushed a loose cover pin (almost all the way in) over the skewer hole (just to make sure it is hidden - not all were that obvious though).  I found that the pins were too long for the smallest balls, so I had to trim them before pushing them into the balls.  Then thread a ribbon through the loop and tie (again - hiding the hole and the pin in one go).  Form a loop and tie a knot or bow - et voila, a lovely, glamourous Christmas bauble.  

And what's great is that they don't cost much - I already had a supply of balls, glue, ribbon and hairspray, so I only had to fork out for the glitter and pins which came to about £8 total (the pins were the bulk of this), and I've still got loads of glitter left for other projects

Friday, 24 January 2014

More mending

I encountered a bit of a problem when I was about to rehem a pair of linen trousers the other day - the fold had worn and there was now a slit along it.  The big question, of course, was whether or not they warranted being repaired now.  Well, as they were in pretty good condition otherwise, I thought I'd give it a go.  However, I wasn't sure how to go about it.

Thanks to Google, I found a solution.  I unpicked the whole hem on both legs and pressed them.  I then cut a piece of coordinating fabric to cover the hole.  I used a scrap of bias binding I had that I ironed flat.  This was then pinned to the wrong side of the trousers and carefully stitched into place, following the edges of the hole closely (but not so closely that I stitched through the loose threads).

This is what it now looks like:


Next was rehemming.  I turned the trousers inside out and turned the hem up so that the patched hole would be just out of sight from the outside.  In effect, I was shortening the trousers, but only by a a few millimetres. Once I was happy that the hem was even, I pressed it and repeated the process on the other leg (using the first leg's hem measurement as a guide).  They were now ready to stitch back into place.


Et voila!  Almost like new again.

Thursday, 23 January 2014

Blasts from the past

While having a bit of a tidy up recently, I came across a pile of photographs of stuff I've made over the years.  I've had them in various albums in the past, but not collectively for some reason.  I've shown you some of my past projects here and a conversation with a colleague prompted me to scan the photos to share a few more with you.

So here goes - I'll try to remember why and when they were made, but can't promise I'll manage it with all of them.  And if I find any more, I'll let you know!
Needle book - made at my first primary school
Dress for former primary school teacher's
first daughter - made in early teens
3D crewel embroidery - made in my teens
Kate Greenaway initial - made in my teens
Needlepoint sampler - made in my teens
Crewel work picture - made in my teens
Celtic cross - made in my teens
Needlepoint version of
David painting - late teens
Needlepoint depiction of spring -
stitched during my first year at uni